Latest update: January 2026
Tested with: DSM 7.2, 7.3
Skill level: Entry
- Overview
- Install Container Manager
- Confirm your Docker volume
- Create back-end folders and files
- Confirm your user ID number
- Deploy File Browser
- Sign in to File Browser
1. Overview
File Browser is a “create-your-own-cloud-kind of software” which, as the name strongly suggests, helps you browse your files, specifically from a web browser. It gives you access to the directories you specifically choose, and it supports uploading, deleting, previewing and editing. In this guide we’ll install it on a Synology NAS.
What you’ll need
- A Synology NAS with free space for Container Manager and the File Browser container.
- Shell access to your NAS with an admin account. Learn how to access the shell in my guide, How to SSH into your Synology NAS.
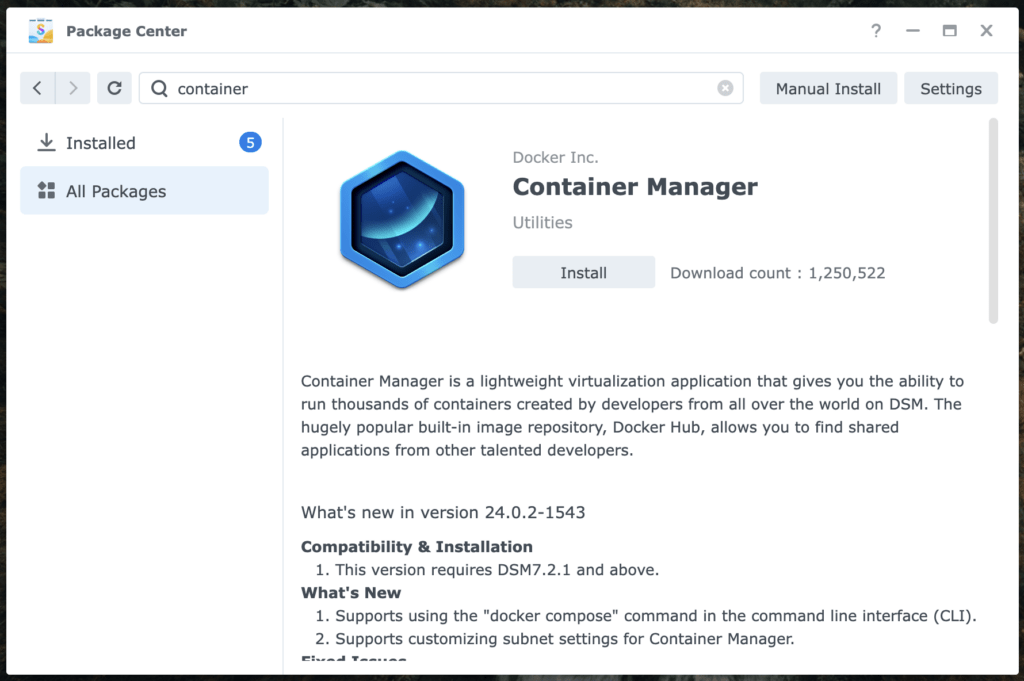
2. Install Container Manager
Container Manager is Synology’s GUI frontend for the Docker engine. Skip this step if you’ve already installed it.
- Sign into your NAS from the DSM web UI with an admin account.
- Install Container Manager from the Package Center.
Note
During the installation, you will be prompted to configure the bridge network. For most people it’s fine to use the installer’s default options.
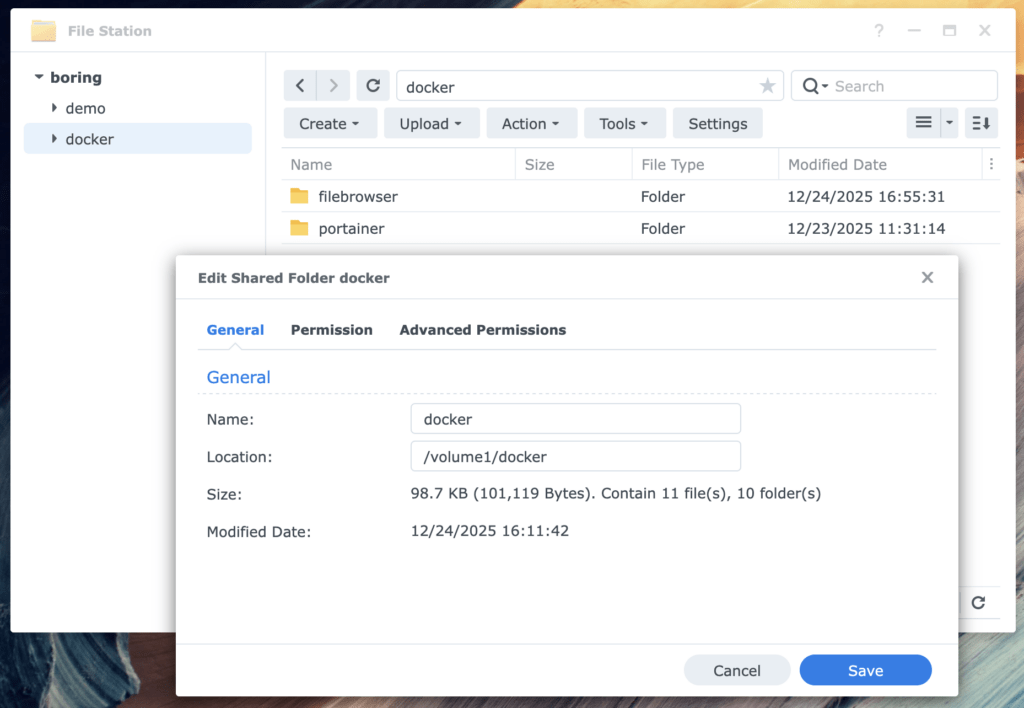
3. Confirm your Docker volume
The volume Container Manager uses for Docker can vary depending upon the number of volumes in your NAS. Our guide assumes it uses volume1.
- Locate the docker folder in File Station on your NAS.
- Open the folder’s Properties.
- If the Location field lists /volume1/docker, volume1 is the Docker volume on your system. If the location field lists a different volume (/volume2/docker, volume3, etc), take note of it for steps 4 and 5.
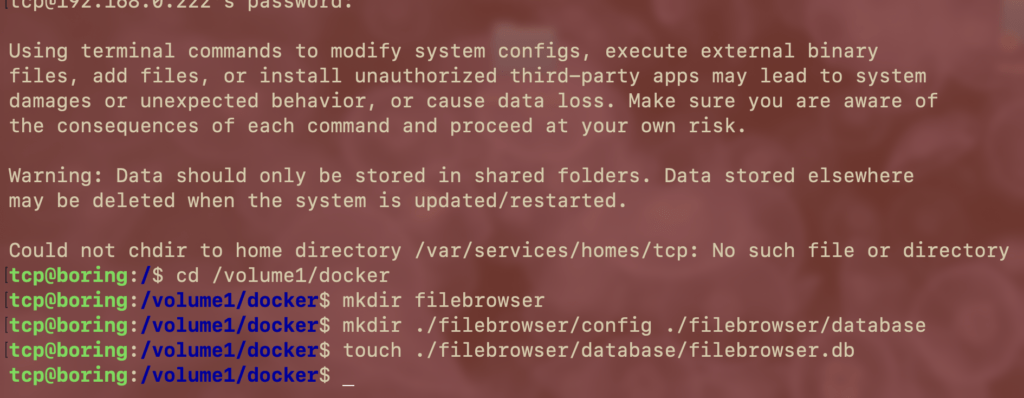
4. Create back-end folders and files
Container Manager requires that we manually create several folders and one file that File Browser will use. We’ll accomplish this from the Linux shell on your NAS.
- Connect to your NAS’s shell via SSH. If you don’t know how to connect, learn how in my other guide, How to SSH into your Synology NAS.
- Change the current working directory to your docker directory with the cd command below. If your Docker volume is not volume1, edit the command to match your volume.
cd /volume1/docker - Create the main File Browser directory with the mkdir command:
mkdir filebrowser. - Create two more directories named config and database within the filebrowser directory:
mkdir ./filebrowser/config ./filebrowser/database - Create an empty file named filebrowser.db in the database directory using the touch command:
touch ./filebrowser/filebrowser.db
5. Confirm your user ID number
File Manager needs our user ID number in the configuration, and we can learn what it is with the Linux shell.
- Enter the command below at the shell. In most cases it will return the number 1026. Save the number it returns for our next step.
id -u
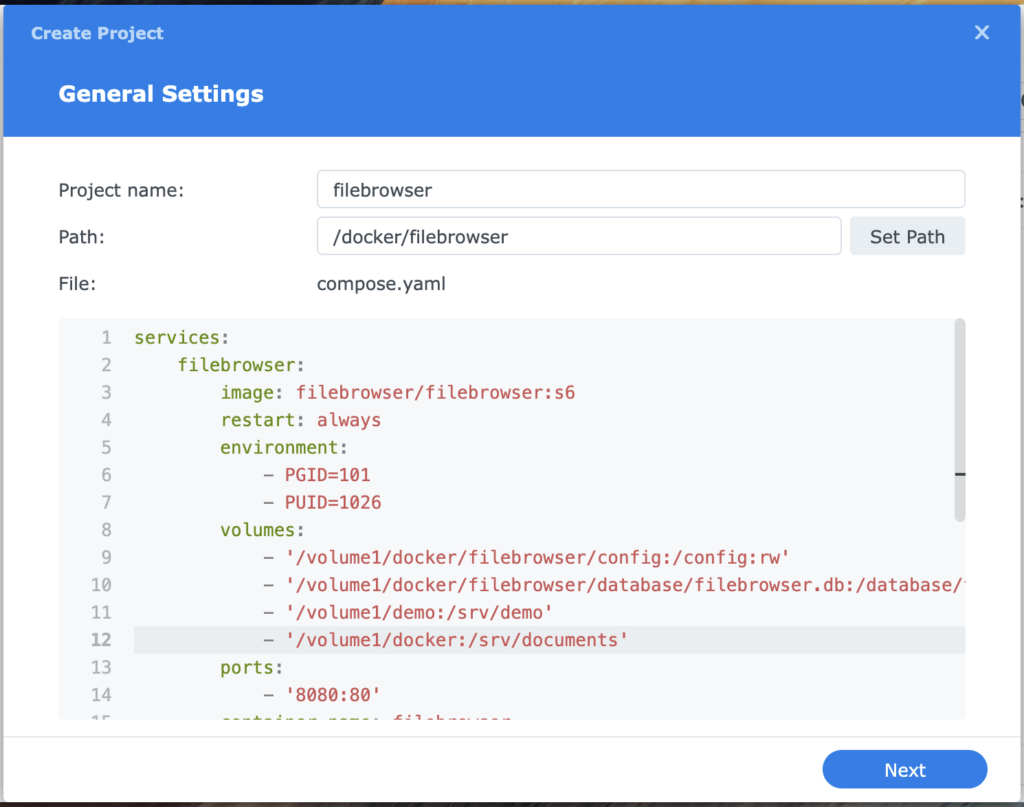
6. Deploy File Browser
We will deploy File Browser by creating a project in Container Manager. Container Manager projects are a GUI wrapper for applications created in Docker Compose.
- Create a new project in Container Manager > Project.
- Give the project a meaningful name in General Settings. In this guide we name it filebrowser.
- Set the Path to the folder named filebrowser that we created in step 4.
- Change the Source to Create docker-compose.yaml and paste the following configuration template into the project editor.
services:
    filebrowser:
        image: filebrowser/filebrowser:s6
        restart: always
        environment:
            - PGID=101
            - PUID=1026
        volumes:
            - '/volume1/docker/filebrowser/config:/config:rw'
            - '/volume1/docker/filebrowser/database/filebrowser.db:/database/filebrowser.db:rw'
            - '/volume1/documents:/srv/documents'
            - '/volume1/demo:/srv/demo'
        ports:
            - '8080:80'
container_name: filebrowser- Edit the environment, volumes, and ports sections so they are accurate for your system:
- environment
- Edit the PUID number to match your user ID from step 5.
- volumes
- If volume1 is not your Docker volume, edit the first two lines of the volumes section (the lines ending in config:rw and filebrowser.db:rw) so they match your docker volume.
- Edit the next two lines to include the folders you want to access in File Manager. Our example shares the folders documents and demo.
In the line that says – ‘/volume1/documents:/srv/documents‘- /volume1/documents is the path to our shared folder. Replace this with the path to a folder of your choice.
- :/srv/ tells File Manger to “Serve” our shared folder. Do not change this.
- documents tells File Manager what to call our shared folder. Replace this with a unique name appropriate for your data.
- You can list as many folders as you’d like by putting each on its own line with the path and a unique name, as in our example.
- ports
- Our template configuration enables access to File Browser on port 8080. If this port is already in use by another container or application, change it to a different number.
- environment
Important
The indentation for each line must be consistent in your configuration. Make sure you precisely match the indentation in our template.
- Select Next to continue past Web portal settings and on to Summary. Select Start the project once it is created and then finish creating the project.
File Browser will now be deployed on your NAS.
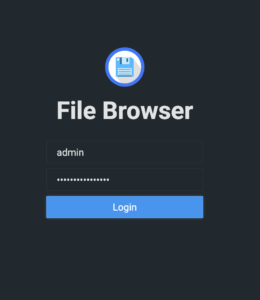
7. Sign in to File Browser
File Browser creates an admin account by default with a randomly generated password. This password is stored in the Docker logs for File Browser. We will obtain the password via the Linux shell and then sign in.
- From the shell, use the command below to check File Manager’s Docker logs. We’ll find the admin password in the output. You will be prompted for your DSM account password, as well as given a warning which you should ignore.
sudo docker logs filebrowser - Find the line that says User ‘admin’ initialized with randomly generated password:, and note the password.

- Access the File Manager sign-on page from your web browser with the url below, substituting your NAS’s IP address and, if you changed it from our template, the port.
http://nas_ip_address:8080 - Sign in to File Manager as admin with the password we found in the Docker logs.
From here, File Browser is ready to use. We suggest starting by changing the admin password or creating a new account, but that’s entirely up to you.
Good luck, have fun, and happy self-hosting!!1!!!1
TCP